
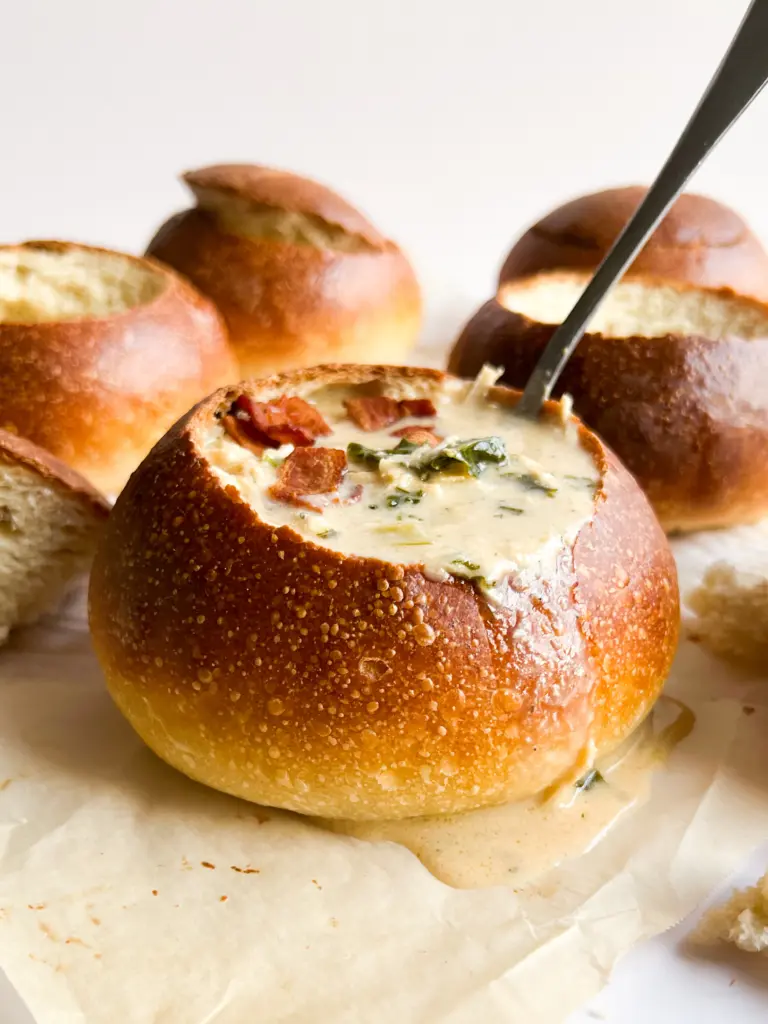
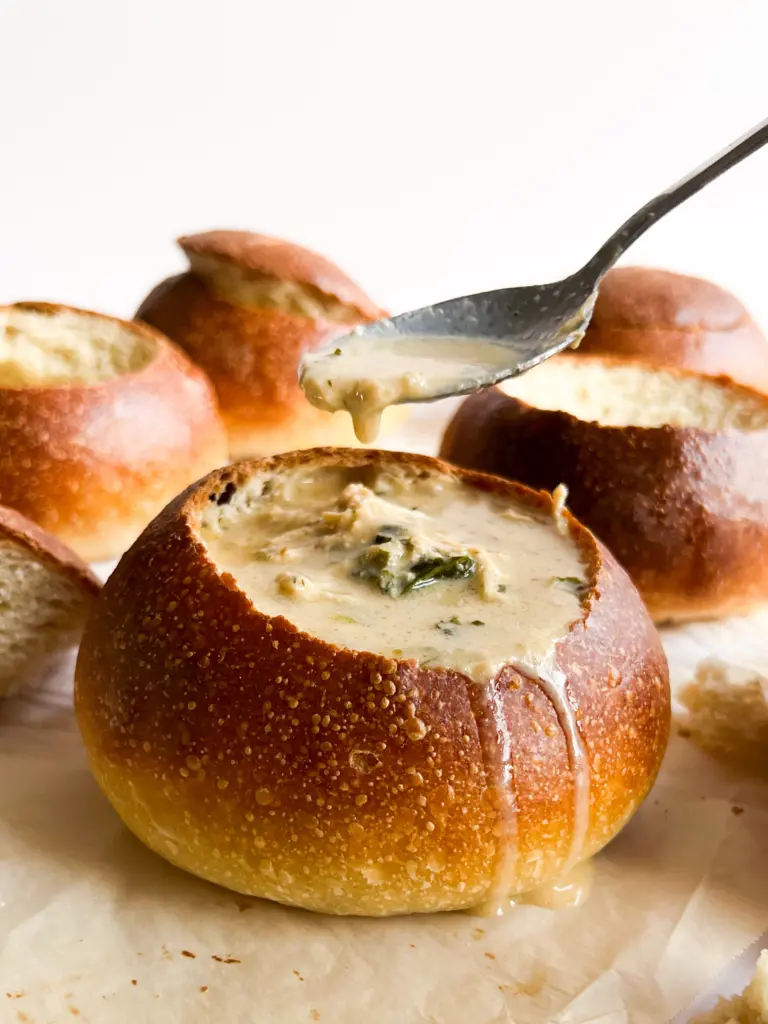
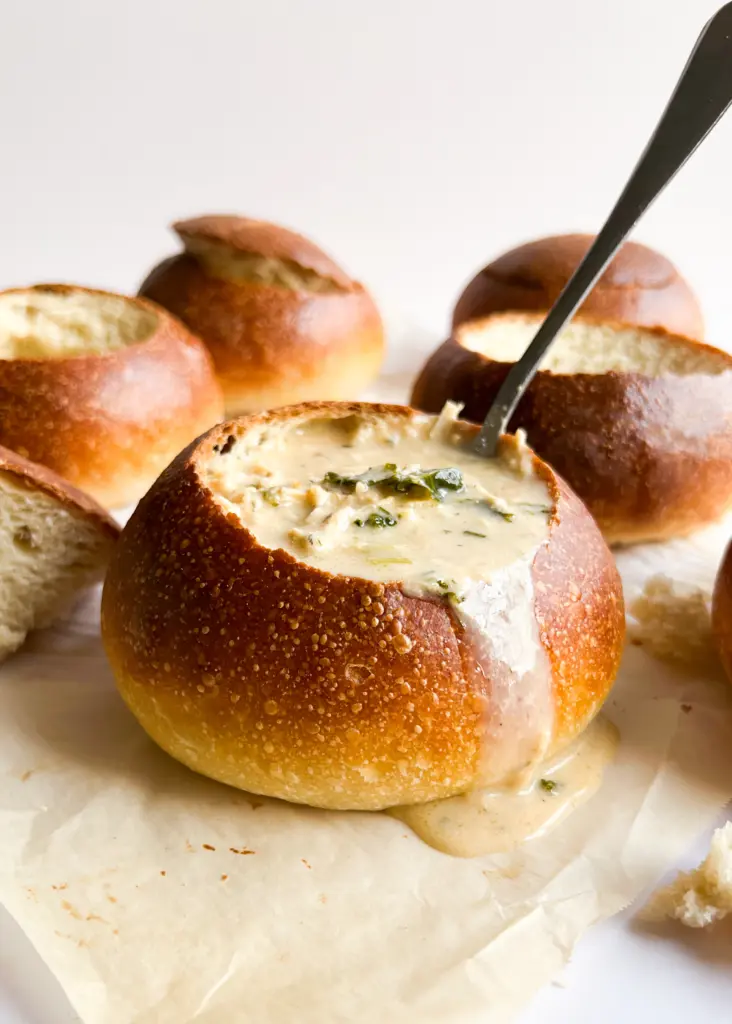
The air is crisp, and that means soup season! What better way to serve your favorite fall soups than in a sourdough bread bowl? These bread bowls have a chewy crust and a tight crumb, making them ideal for holding even the thinnest of soups. Take your soup recipe and make it so much better with these sure to impress sourdough bread bowls.
Why These Sourdough Bread Bowls are Perfect
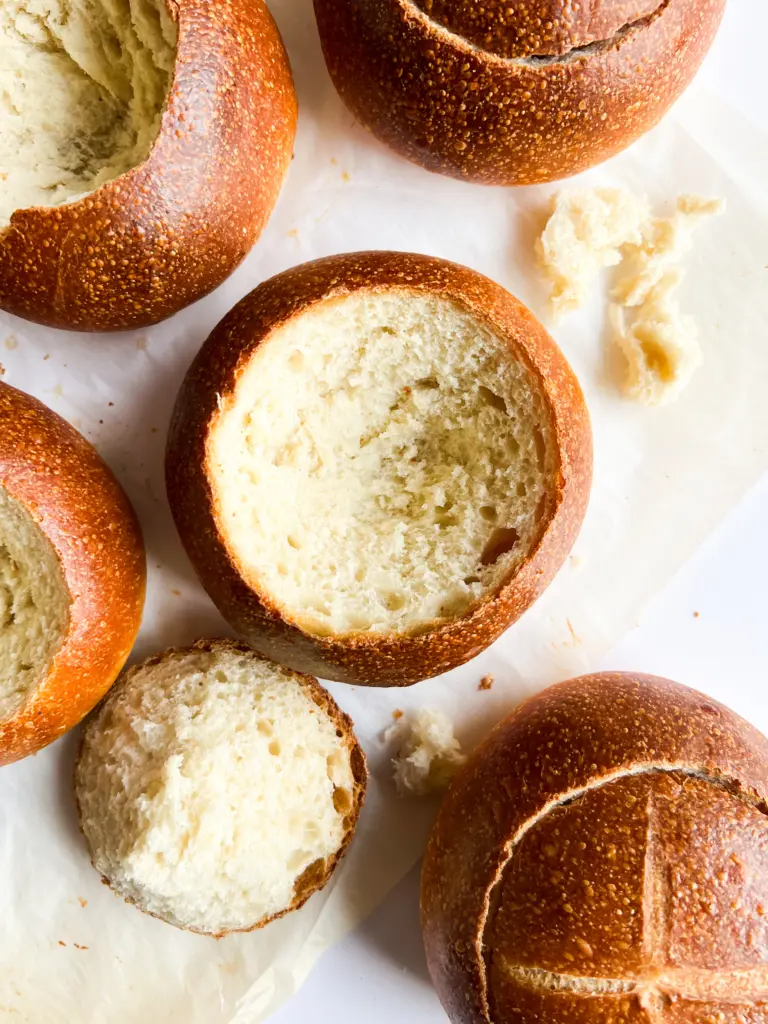
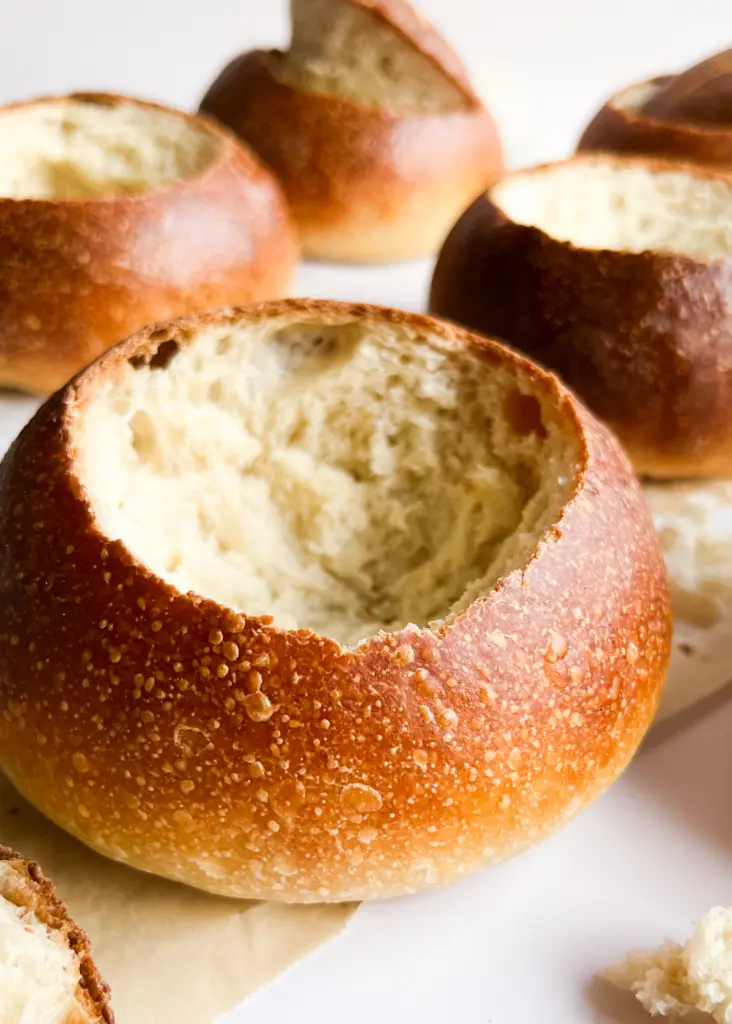
I love a good bread bowl filled with a warm hearty soup. You can’t have soup without bread, so why not just eat the soup out of the bread? These bread bowls bake up perfectly round without having to be cooked in a Dutch oven. With a soft flavorful interior and chewy crust that will hold in even the thinnest soups, you are going to love these bread bowls too.
This recipe is incredibly simple, and is perfect for beginner and novice sourdough bakers alike. They rise so well, you wouldn’t believe that they aren’t cooked in a Dutch oven. Not having to cook them in a Dutch oven allows you to cook them in batches instead of individually, saving you a whole lot of time. The entire recipe is a breeze, and I’ve also included a sample bakers schedule to make it that much easier!
Using Your Sourdough Starter
What is Sourdough Starter? These homemade sourdough bread bowls use sourdough starter to rise instead of traditional bakers yeast. If you’re not sure what sourdough starter is, check out my How to Make a Sourdough Starter post to learn all about it.
For this sourdough bread bowl recipe use your sourdough starter when it is at its peak. When is that? Each sourdough starter will behave differently, so learn your starter to know for sure its ready to bake with. As a general rule of thumb most starters will peak about 8-16 hours after their last feeding. When your starter is at its peak it will have at least doubled in size, be light, airy, and filled with bubbles.
Still not sure? Try a float test. To float your starter drop a spoonful into a glass of water to see if it floats. If it does your starter is mature and ready to bake with!
Tips and Tools
Plan Ahead: Sourdough baked goods have a long rise time. Take a look at my Sample Bakers Schedule before you begin so you have a better idea on when to begin and how to plan ahead.
Tools I Recommend
For this recipe I find the following tools quite handy (Amazon affiliate links):
Measure Your Ingredients
It can be easy to add too much flour to the dough when measuring in cups, do for best results I recommend weighing the ingredients. The recipe card below has weight and volume measurements for the listed ingredients. If using the volume measurements, try spooning the flour into the measuring cup to prevent it from packing and creating a dough that is too dry.
Do I Need Proofing Baskets?
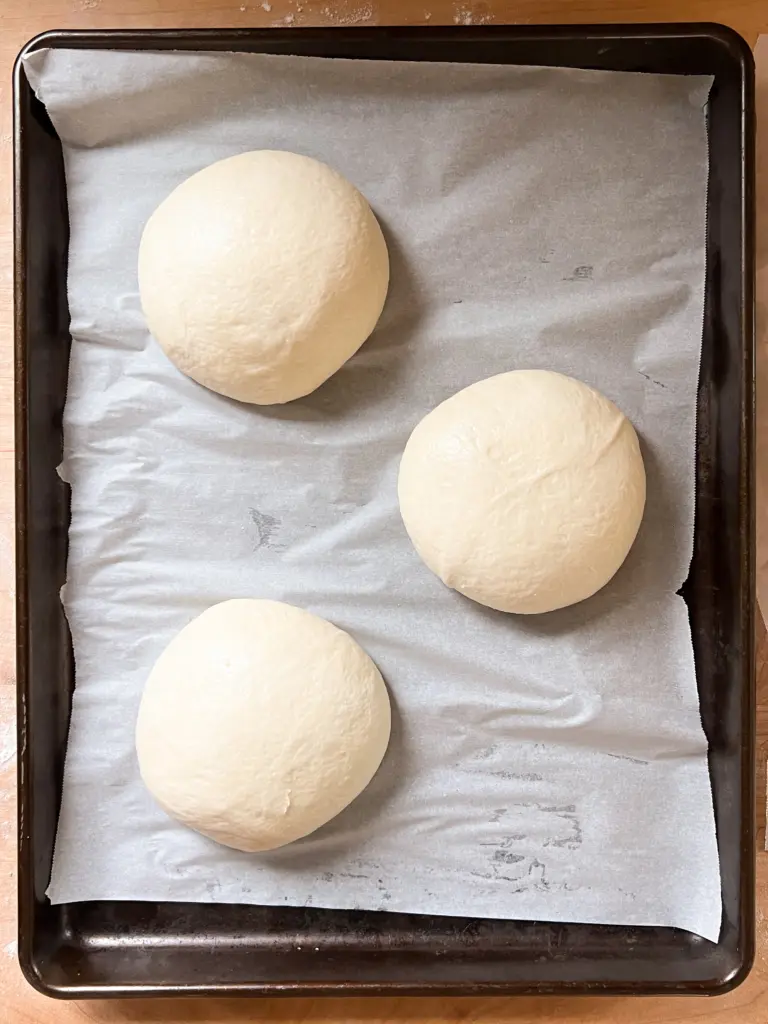
These bread bowls look like mini sourdough loaves and you shape them like you would a regular sourdough bread recipe, but they don’t need to proof in a proofing basket. After shaping, place the balls of dough seam side down on a parchment lined baking sheet, leaving a few inches between each, and allow them to proof at room temperature for about two hours.
How do You Bake Them Without a Dutch Oven?
This recipe does not require you to bake each bread bowl in a Dutch oven. For those of us with only one or two Dutch ovens, it could become a very lengthy and tedious task. These bread bowls are baked with a method called open bake. To open bake means to bake them on a regular baking sheet right inside the oven. To bake them this way and still achieve a good rise the oven is first filled with steam. This is done by preheating a roasting pan in the oven, and pouring two cups of room temperature water into the roasting pan right before placing the bread bowls in the oven to bake. The steam helps the bread bowls to rise properly and makes using a Dutch oven unnecessary.
Sample Bakers Timeline
Sourdough baked goods have a long rise time. To make your life a whole lot easier I have included this sample bakers timeline to give you a better idea on when to start and how to plan ahead.
8 PM (day 1): Mix the dough together and cover to rest.
8:30 PM (day 1): Knead the dough, and cover for bulk ferment.
6 AM (day 2): Cut and shape your sourdough bread bowls.
6:30 AM (day 2): Cover the bread bowls for second rise.
8:30 AM (day 2): Bake the bread bowls.
9 AM (day 2): Set them aside and allow them to cool for two hours at room temperature.
11 AM (day 2): Store the bread bowls for later, or serve them with your favorite soup.
Soups to Try in a Sourdough Bread Bowl
Want to make some sourdough bread bowls but unsure what to serve in them? Try one of these fun and easy soup recipes!
- Chicken Taco Soup
- Easy Broccoli Cheese Soup
- Apple Beer Cheese Soup
- Carrot and Coriander Soup
- Chicken Florentine Soup
- Jalapeno Popper Soup
Store at Room Temperature: Sourdough bread bowls can be left uncut at room temperature for up to three days. Store them in a bread bag to keep the crust from getting soft.
Freeze Them: Allow the bread bowls to cool completely after baking before freezing in a freezer safe container or bag for up to a month. When ready to serve allow the bread bowls to thaw completely.
More Sourdough Recipes to Try
- Sourdough Crescent Dinner Rolls
- Sourdough Brown Butter Cinnamon Rolls
- Creamy Chicken and Sourdough Dumplings
- Sourdough Country Skillet Bread

Sourdough Bread Bowls
6
servings40
minutes10
minutesThe air is crisp, and that means soup season! What better way to serve your favorite fall soups than in a sourdough bread bowl? These bread bowls have a chewy crust and a tight crumb, making them ideal for holding even the thinnest of soups. Take your soup recipe and make it so much better with these sure to impress sourdough bread bowls.
Ingredients
- The Dough
1/2 cup sourdough starter, active and bubbly (100g)
2 cups filtered water (480g)
2 tbs granulated sugar (30g)
1/4 cup olive oil (55g)
7 cups bread flour (840g)
1 tsp salt (8g)
- The Egg Wash
1 large egg
1 tbs filtered water
Directions
- Make the Dough
- In a large bowl, whisk together the active sourdough starter and filtered water until the starter is fully dissolved. Next, whisk in the granulated sugar and olive oil until well incorporated.
- Sift the flour and salt into the bowl, mixing either by hand or with a stand mixer until fully incorporated.
- Strengthen the Dough
- After mixing, cover the dough with a damp cloth and allow it to rest for 15 minutes allowing the flour to fully absorb all the liquid.
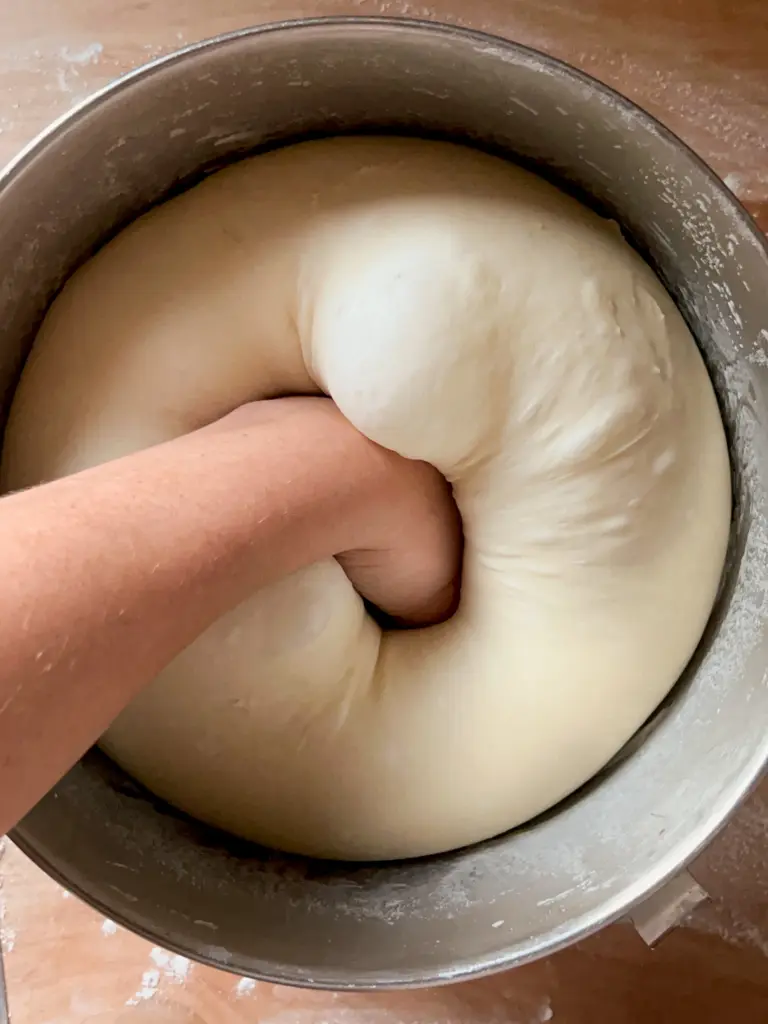
- Uncover the dough and knead it on medium speed with a dough hook attachment for approximately 6 minutes. The dough is ready when it becomes smooth and pulls away from the sides of the bowl. If working without a stand mixer strengthen knead the dough by hand for the same amount of time.
- Bulk Fermentation
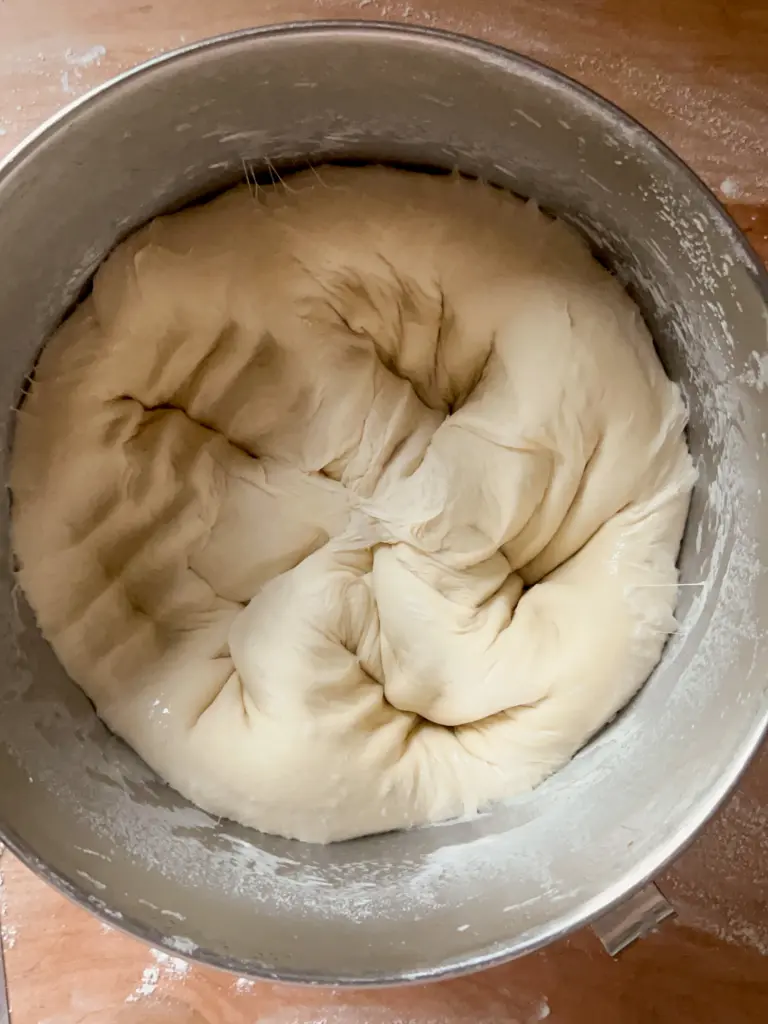
- Cover the bowl with a damp cloth to bulk ferment the dough at 71°F(21°C) for 8-10 hours, or overnight. The dough will need to rise until it has risen to double its original size. It’s important to note that rise times can vary based on the temperature in your home, so adjust the time accordingly.
- Shape The Bowls
- When ready, punch down the dough and turn it out onto a lightly floured work surface.
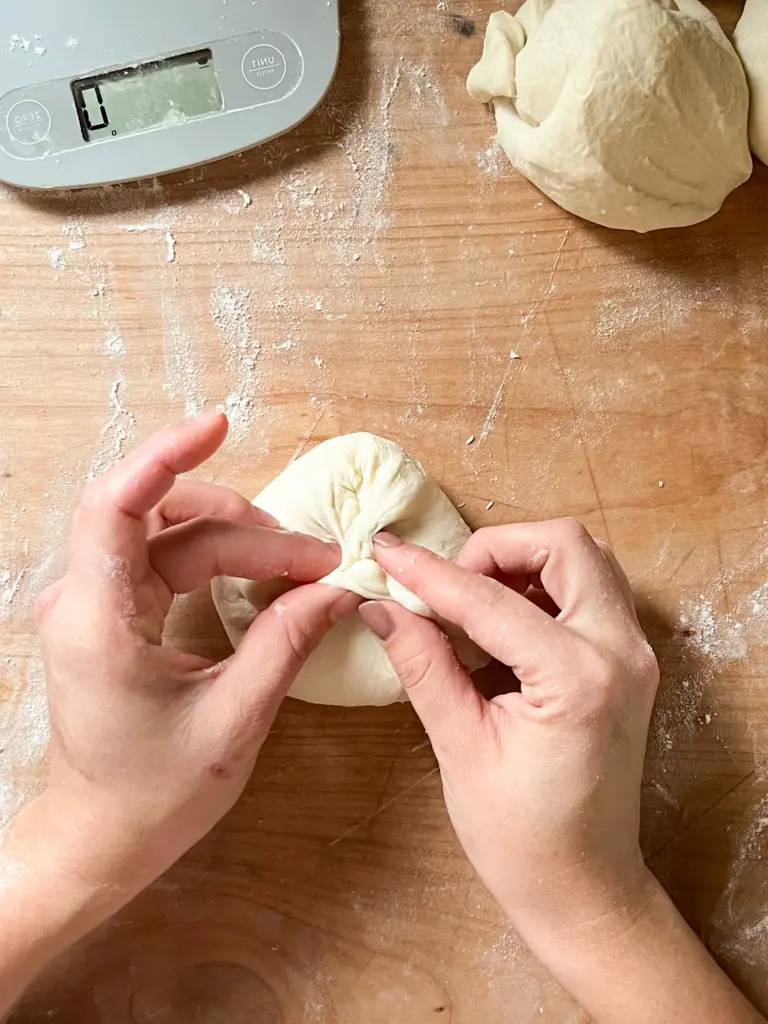
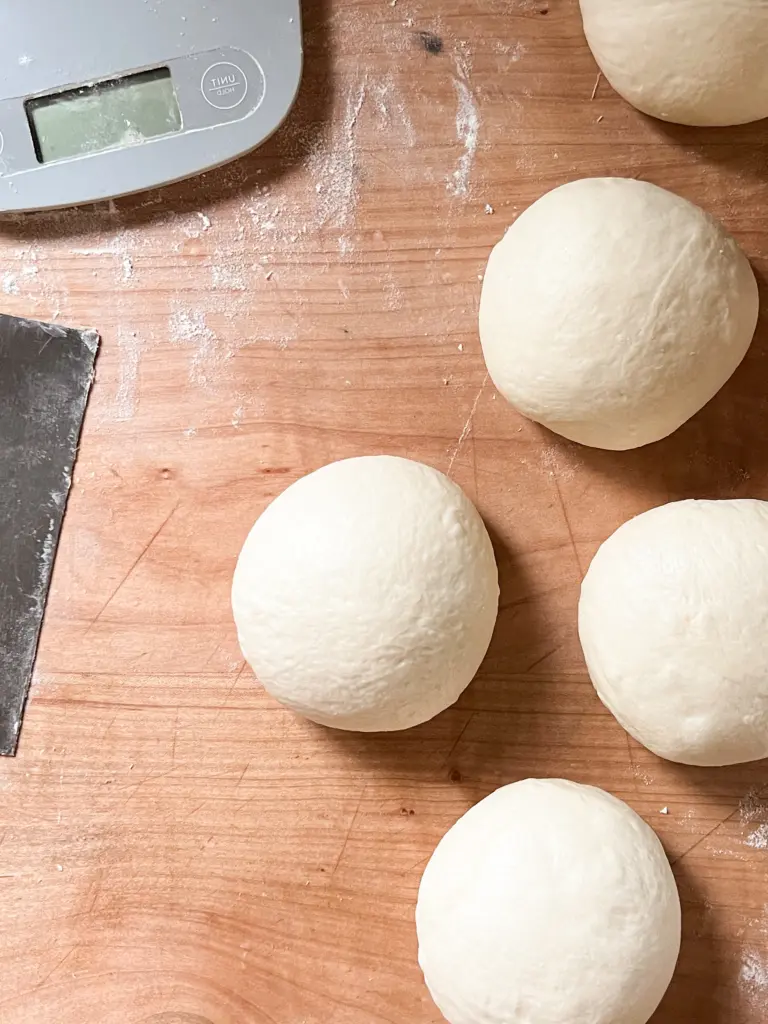
- Divide the dough into six equal portions and pinch the edges of each portion together to create a roughly shaped ball.
- Allow the dough to rest for a few minutes before shaping them into tight little round balls. To do this use your hands or a bench scraper to push and pull the dough around your work surface and create tension on the skin.
- Second Rise
- Place the shaped bread bowls on a parchment lined baking sheet, leaving 3″ of space between each to allow room for rising.
- Let them rise at a temperature of around 71°F (21°C) for about 2 hours. During this second rise, the bread bowls will increase in size and become visibly poofy. It’s important to note that rise times can vary based on the temperature in your home, so adjust the time accordingly.
- Bake The Bowls
- Position a roasting pan on the lowest rack of your oven, and pre-heat the oven to 450°F (330°C) with the roasting pan inside.
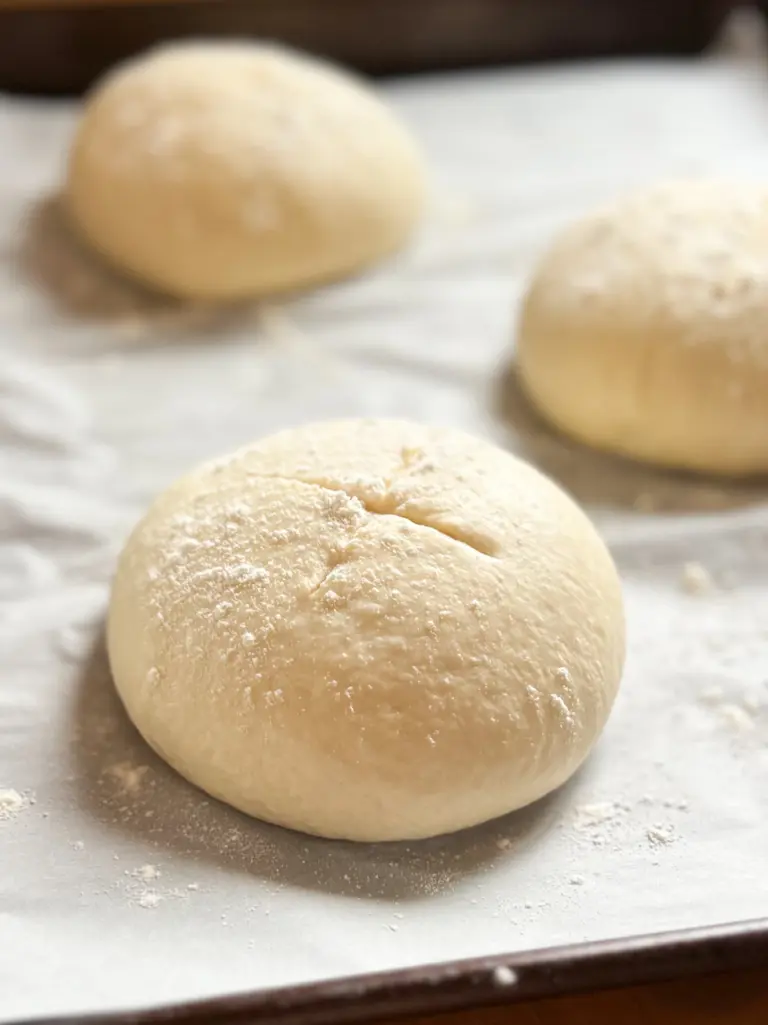
- Whisk together the egg and water to form and egg wash and baste each ball of dough, or alternatively sprinkle the top of each with flour. Then use a bread lame or a sharp knife to create 2″ slashes in the shape of a cross on the top of each.
- When the oven if fully preheated, quickly poor 2 cups of room temperature water into the bottom roasting pan, being careful not to get burned by the steam, and shut the oven door.
- Place the baking sheet with the bread bowls on the rack just above the roasting pan, again being carful not to get burned by the steam, and bake for 30-35 minutes, or until the tops are fully browned.
- Cool The Bowls
- Once out of the oven allow the bread bowls to cool for at least two hours. During this time the inside of the bowls will continue to cook.
- Core each bowl and serve with your favorite soup. See the above post for instructions on storing.


Notes
- What is Sourdough Starter? These homemade sourdough bread bowls use sourdough starter to rise instead of traditional bakers yeast. If you’re not sure what sourdough starter is, check out my How to Make a Sourdough Starter post to learn all about it.
- Plan Ahead: Sourdough baked goods have a long rise time. Take a look at my Sample Bakers Schedule before you begin so you have a better idea on when to begin and how to plan ahead.
- Tools I recommend (amazon affiliate links): Stand Mixer | Bread Lame | Pastry Brush | Roasting Pan
Did you make this recipe?
Tag @madeinmotherood on Instagram and hashtag it with #madeinmotherhood
Like this recipe?
Follow @madeinmotherhood on Pinterest

So good with tomato soup right next to my grilled cheese sandwich!
Thanks for sharing Joe! I’m happy to hear you liked them!
Can use regular white flour instead of bread flour? If not how can I substitute?
Hey Faye! If using all purpose flour I recommend adding an additional 30 grams. I hope this helps!
These look amazing. Do you value both trays at the same time or 1 at a time over the roasting pan?
Thanks for reaching out Marlene. Whatever will fit comfortably within your oven.
Baking tonight and can’t wait to try them.
Do I HAVE to use the roasting pan with water?
Hey Samantha! The roasting pan with water helps to steam the inside of your oven and give lift to the bread bowls. If you bake without the steam, the crust on your bread bowls will set before they are finished rising and will likely cause your bowls to burst in places.
Are they covered for the second rise? (On the baking sheets?)
Thanks for reaching out Matt. I typically throw a thin cotton kitchen towel over top to prevent dust from getting on them but not weigh them down too much
I made this recipe today and they turned out perfect! Will be using your broccoli cheese soup to fill them tomorrow night. Thank you for a great recipe!
Thanks for sharing Kelly! I am happy to hear you enjoyed them!
Thank you for the detailed instructions, this is so helpful! I will be making these in the next few days. Can this be refrigerated at any point before baking to delay bake so they can be fresh when needed?
Hey Mariah! I would Pop the dough in the fridge after bulk fermentation to slow things down, then adjust your schedule to allow time for shaping and second rise before you bake.